Knife Know How and Cutting Basics
Cutting Basics Knife Hold
Grating (to reduce foods to small shreds by rubbing it on a grater)
Important: When preparing fruits and vegetables, peel and remove tops and bottoms when required
- The handshake-Pinch the knife using the thumb and the index finger on either side of the bolster (the back flat edge of the blade)
- Curl your last three fingers around the handle
- Cuts are made downward with a rocking motion from the tip to the heel of the blade. The knife is not sawed back and forth through foods or used in a choppy banging motion.
- The Claw- Curl your hand into a clawlike position curling the fingertips under.
- Grasp the food being held using the claw and position knife by using the backs of the curled fingers as a cutting guide.
- Wrap fingers around the base of the peeler handle just below the blade.
- Your thumb and index finger should apply pressure to either side of the handle as the blade is scraped (pared) along the skin of the fruit/vegetable using long steady strokes.
- Wrap fingers around the base of the peeler handle just below the blade leaving your index finger positioned at the top of the zesting blade.
- Hold the fruit using the claw hand with the thumb on the bottom and the index finger at the top.
- With the zester at a 45% angle to the fruit, apply consistent pressure with your index finger as you guide the blade down the skin, turning the fruit as you go.
Grating (to reduce foods to small shreds by rubbing it on a grater)
Important: When preparing fruits and vegetables, peel and remove tops and bottoms when required
- Place the box grater on a cutting board with the grating edge facing your dominant hand.
- Select the grating size depending on your specific needs-large wholes for coarse work-cheese, carrots and smaller holes for finer work-grated citrus peel, nutmeg etc.
- Hold the grater with your weaker hand. Slide the food up and down the grater while applying pressure.
- Be careful to avoid cutting fingers and knuckles. Stop grating when the food becomes too small to grate safely.
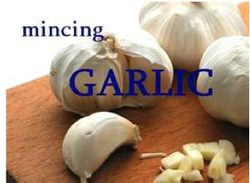
Mincing
(to cut up or grind a food into very small pieces)
Eg. Garlic (Whole = head, Piece = clove)
(to cut up or grind a food into very small pieces)
Eg. Garlic (Whole = head, Piece = clove)
Procedure
Remove clove from head. Lay the side of a French knife flat against the clove. Using the heel of the opposite hand, press down firmly on the side of the knife.
Remove the papery coating from the clove. Discard. Chop the garlic into very small pieces using the French knife.
Scrape the pieces into a pile on the cutting board. Using the tip of the knife, begin pushing the pieces into the cutting board creating a garlic paste. Continue until smooth and free of lumps.
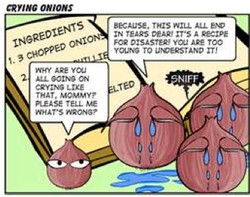
Dicing
(to cut food into small cubes)
Eg. Onion
(to cut food into small cubes)
Eg. Onion
Procedure
Cut the top point of the onion of to reveal a flat surface.
Cut the onion in half straight through the rootball.
Lay one side of the onion directly on the cutting board (flat side down).
Cut lengthwise through the onion to a point approximately 1 cm from the rootball at 2 cm intervals.
Important!: Make sure to leave the rootball intact as this is what is holding the onion layers together.
Cut crossways through the lengthwise cuts at 2 cm intervals. This will create your dice.
Grade Ten Knife Skills
Baton- The baton is the largest stick-cut you can cut. It is used for crudites and for presentation purposes. While not used as much as the rest, it is the foundation for the more common Large Dice or paysanne cut. Dimensions: 12mm X 12mm X 6cm (1/2 in X 1/2 in X 2-1/2 in)
Paysanne- While cubed items are common, sometimes you would prefer a slimmer, flat, square item. This is called the Paysanne cut. It is generally used for garnishing soups, salads and desserts with harder vegetables and fruits (apples, pears, beets, carrots etc). This is achieved by creating your desired stick-cut size, then slicing thinly to produce a thin square (aka tile). Dimensions: 12mm X 12mm X 3mm (1/2 in X 1/2 in X 1/8 in). Warning! Be careful not to overcook a vegetable cut paysanne style or it will turn to mush!!!
Allumette- Sometimes also called the "matchstick cut" (which is the translation of "allumette" from French) the allumette measures approximately 6mm x 6mm x 70mm (1/4 inch x1/4 inch x 2 inches). It's also the starting point for the small dice.
Macedoine- Cubes with sides measuring approximately 6mm (1/4 inch), created by cutting the allumette cut into cubes. The macedoine cut is used on hard fruits and vegetables as a side dish or as a component of a salad or dessert. Never overcook the macedoine cut as the food will turn to mush.
